After the successful Installation
Bulk Mail for Acomba (BMFA) is extremely simplified in order to make it easy to operate. When the project is properly installed there is the Windows application named the Data Source Manager that let you connect to Acomba database and display and manage found records and MS Word Add-in named the AcMailSender that is going to help you send the e-mails or print final documents. The Add-in is creating the ribbon in the Word named Mail Sender.
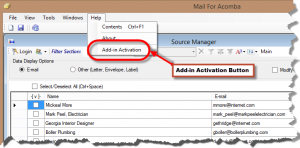
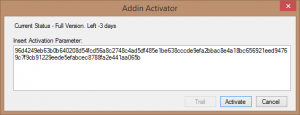
In order to create and send the newsletter first the data source has to be created in the Data Source Manager. However, if you open the source manager for the first time make sure that the Word Add-in is activated. In order to activate the Add-in you have to click Help button on the Menu bar and then [Add-in Activation] button which you find on the bottom of the dropped list. It will open the Activation interface where you have two options. First, you can select the trail button. This action will activate the Add-in for 14 days. You don’t have to send any information to us in order to activate the trail however the trail can be activated only ones and then you need to activate the subscription by clicking the Activate button. In order to obtain the activation key you should send as the ticket using out Support Tickets side.
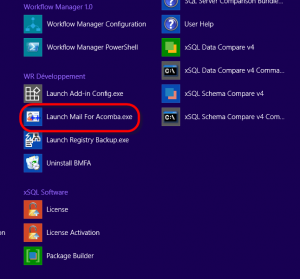
All procedures require selecting the Recipients group between Customers, Suppliers, and Employees. For that you need to load the Data Source Manager by clicking the shortcut on the desktop or selecting it from the Start => All Programs => WR Développement => Lunch Mail For Acomba.exe.
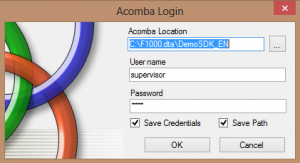
When the Source Manager is loading it immediately connects to the Acomba Software what is requiring the credentials. The credentials include the localization of Acomba (usually it is X:\F1000.dta\[Location of Acomba]. It requires selecting the folder not the file. When the location is established the application will ask you for automated saving of the Acomba path. It is up to you but saving it is recommended. Next, you have to insert the User Name and password that also can be saved for automate reloading on the next time.
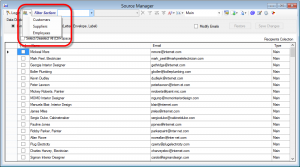
When the Data Source Manager is active you need to select the type of recipients that you want to display. You can choose between Customers, Suppliers, and Employees. You can create the data source only from the one group of the time. When selected and there is at list one row of the records in the database that belong to the selected group it will be displayed in the recipients table. The filter table by default is invisible until the filter action is applied.
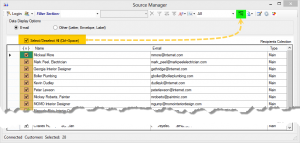
Now you have to choice. For simplified process where all recipients are involved and the filter is not applied you can simply check the checkbox located above the table with the Select/Deselect All (Ctrl+Space) caption and all recipients are going to be select at ones. Next, you just have to click the Create Source button and wait for the message informing you that the data source is created successfully.
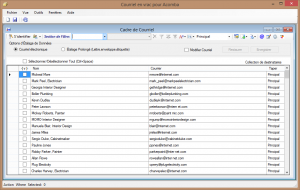
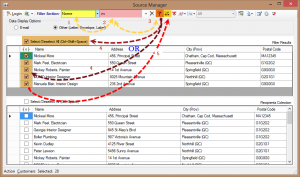
You can also use the filter in order to narrow the selection of recipients but this topic will be explain in the next part. Just for the sample see the image below. It can give you an idea how some options of the filter are working.
When the source file is ready it is time to open already created and saved document or if you don’t have any yet, load the new one instead. You can apply whole power of the word and create the sunning newsletters. As the bonus you can also include the special variables that are available and ready to access in the “Mailings” ribbon by clicking [Insert Merged Field] Menu button and then selection the appropriate variable that represents the group of the records exported in the Source File.
It will insert the name, address, e-mail and more of each recipient. In other word a single variable will represent the record of each recipient that exists in the Source File. You can create envelops and labels the same way. For that you will have to select the appropriate option in the “Mail for Acomba” ribbon. Applying to the image below, in the group of tools named “Procedure Setup” click the [Procedure Type] combo box and select the type of procedure that you want to continue with. E-mail option is by default but when you click the combo box you will see the following choices:
- E-mail – It is default option set any time you open the document. When selected it let you prepare document for sending it as an e-mail. For that occasion you have to choices of the email type in the second combo box named the [E-mail Type]
- Letter – it let you manage the document as the letter. It is the MS Word default option
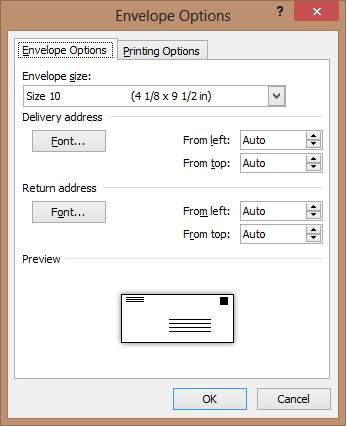
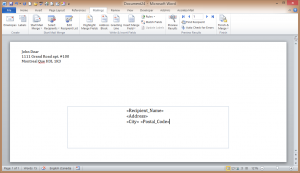
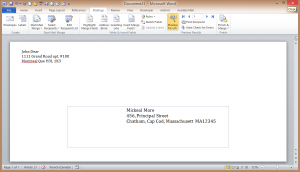
- Envelop – When is selected it will format the document page as envelop and open the envelop dialog for additional setup. In this case make sure that you name and address is stored in the address book in order to make the Word put them automatically on envelop as the return address.
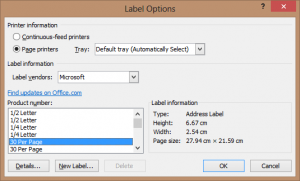
- Labels – It will open the dialog for the labels setup and formatting. If you are not familiar with that option just follow attached information or refer to the Office Help File (click F1 when the Word document is opened and active)
As you see the process of creating the collection of emails, envelops, letters, or labels in simple and easy.
When whole is set it only requires a clicking of [Finish & Merge] Menu button and then if it is sending the e-mail you should click [Send E-mail Messages…] or in the case of printing the letters, envelops, or labels, clicking [Print Documents…] will open the printer dialog. If necessary you can also modify individual documents from the collection before sending the e-mail or printing.
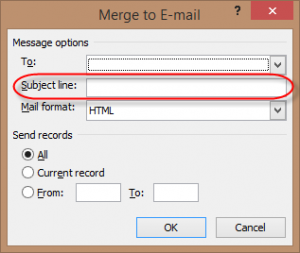
Above is the final dialong window before sending e-mail. It is important to inset the subject of e-mail. It is looking bad when the e-mail is without the subject. Everybody should avoid it. The same subject will be seen by every recipient that will receive the newsletter. You can still to stop the process of sending by clicking the [Cancel] button and also manipulate the recipients that should receive the mail but since you set everything following you preferences there is probably the [Cancel] button can only play important role in order to stop the process at the last moment otherwise by clicking [OK] button the process of formatting and sending is beginning.
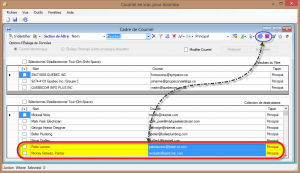
There is important to remember that if the word will find a problematic pattern of e-mail address it will stop the process and display the Dialog Window where will ask for your attention and additional choice. In order to avoid it you should test the pattern of all addresses where you want to send you mail. For that you have a special tool in the data Source Manager that when is clicked it is testing each e-mail address for the problematic pattern and when is found it indicates it with the yellow color of the row background and on the image below
When the bad patter is found the additional button is appearing. It resets the indicator of the problem patter and returns the row background to its default white color.
When the bad e-mails are found you have a few options to avoid passing them to the mail merger.
- You can uncheck the recipient and not include the row of data into the source file until you find the right e-mail address
- You can modify the address in the data source only and leave the problematic address in the database without any changes
- You can modify the address in the database using Acomba tools and return to Data Source Manager then refresh records
- You can modify the address in the Data Source Manager and save it into the Acomba database
If you decide to modify the database from the Source Manager you have to:
- Select the indicated row then double click the cell with wrong pattern of the e-mail address.
- Before or after that check the checkbox named [Modify Emails]
- Next modify it and the [Save Changes] button that is next to [Modify Emails] checkbox.
If you make mistake in writing or you lose the e-mail string you can always click the [Restore] button in order to restore its original address that it was before the modification. I will return to the subject in the article. I will explain in details when and how to use it. Currently it is so much information that it can be lost when it is extremely important option in order to avoid stops in sending the merged e-mail. Perhaps it is not a big deal when there are a few bad e-mail addresses but it becomes problematic when there are hundreds of them.
Conclusion
In this article I cover the most important procedures that have to be applied in order to simplify the sending of multiply e-mails or the newsletters. There are necessary a few clicks only and thousands of e-mails are sending in extremely short time without blocking the system or consuming resources or the computer. The process of sending is smooth and easy. I also have explained some tools and options that can be applied in the process. I also have mentioned about other options then sending the e-mails that can be achieved with BMFA such creating the letters, envelops and labels. In the next articles we will analyze the filter and other tools that can help you in narrowing the data to the most accurate.





Leave a Reply